DIY Photo Embroidery Project Tutorial March 29 2020

I've always wanted to try Photo Embroidery and with our recent Stay at Home order, I thought this was the perfect time to try. For those of you unfamiliar with Photo Embroidery, it's a technique for embellishing photographs with different types of stitching. I really love the dimensional feel it gives to both black & white as well as color photos. Follow along as I share how I created this lovely piece of affordable art.

Materials Needed:
Photograph (color or black and white)
Avery Fabric Transfer (for color Inkjet printers) - I used this one
Iron
Natural fabric (I'm using cotton but all linen works well too)
5" Embroidery Hoop, Embroidery Floss, Needle, Threader
Sharp Scissors - I love these mini, super, sharp ones
Step 1
Print out photo on Image Transfer Paper. Remember, image will be reversed when transfered onto fabric. Keep this in mind if you need to rotate the photo on your computer before printing.
Step 2
Follow the specific Image Transfer Paper manufacturer directions for ironing the image onto fabric. Use a dry iron (NO steam) at the highest temperature. Press fabric now if needed for a wrinkle-free surface. Place Transfer Paper with printed image facing down on fabric. Use long, firm pressure and long strokes over all edges, corners, and center to apply transfer to fabric.


Step 3
Remove adhered transfer from ironing board to cool for about 5 minutes. Gently peel back corner of transfer paper and remove entire paper backing.

Step 4
Select the embroidery thread colors you want to use for the project and gather a needle, threader (a must have for me), and scissors. Load and center embroidery hoop with cactus image. It's important not move or unload the embroidery hoop during stitching as the transferred fabric will be creased where the hoop is laying.

Step 5
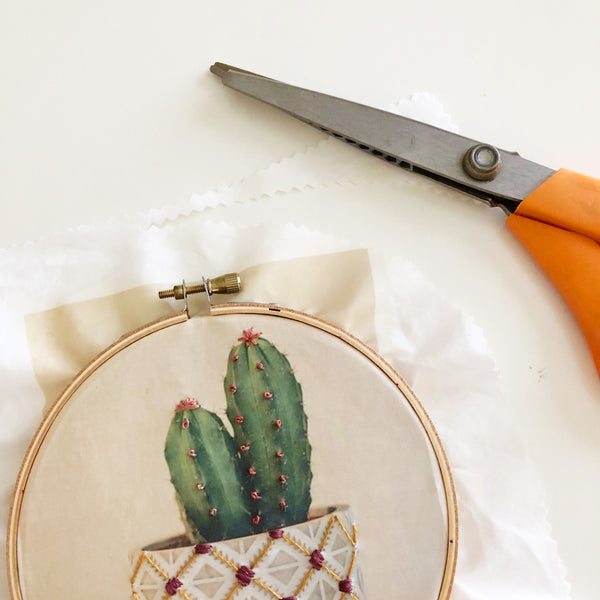
Begin stitching. I chose to use 3 out of the 6 embroidery thread strands for each stitch color. I decided to start with french knots on the cactus and created a little flower on the cactus top with simple running stitches. Then I moved to the pot where I chose to do running stitches in a golden color to run over the diagonal patterns. The options for stitching and adding designs to the pot are endless. Make them as simple or as complicated as desired.


Step 6
Finishing your piece. Trim edges of fabric around hoop leaving about 1"- 1 1/2" border. Tip: Use pinking shears to prevent fabric from fraying. Finish with large running stitches and gather to pull fabric together.


Wow, wasn't that easy? Now you have a Photo Embroidery piece of art! I can't wait to hang mine in my studio office. I've created a very limited number of affordable Photo Embroidery kits for you to make one for yourself or to give as a gift. Grab one here in my shop. Happy Stitching!